


Casper has worn hooded capes for the entirety of his little life. I started making them after I got bored with a cardigan I was knitting whilst pregnant. I decided to make it into a cape with a hood and a fabric button-up yoke. Then I started making them out of old blankets and other discarded knitting projects and then I realised I had heaps of old woolens that had holes or were unflattering or not the right size.
I came up with this method one night when I was half asleep and had to write it down to remember it later (I had a five month old baby at the time). I have always thought I would keep it a secret just in case I get signed to write a super cool recycled sewing book one day but then I realised that there might be people out there with piles of old woolens that they don't know what to with because they have already made too many felted hot water bottle covers. FYI, you can have too many of those.
Casper has worn most of his capes from the newborn stage right through to toddlerdom, so most of the time they are one-size fits all. Great for Autumn and Spring and a nice handmade gift that can be quickly put together for all those last minute baby showers.
Casper has worn most of his capes from the newborn stage right through to toddlerdom, so most of the time they are one-size fits all. Great for Autumn and Spring and a nice handmade gift that can be quickly put together for all those last minute baby showers.
It's a very simple tutorial, albeit quite image heavy. You should be able to make this cape if you have a sewing machine that sews zig-zag and straight stitch (or if you are a dedicated hand sewer, you can absolutely hand-stitch this). The only fancy thing that I recommend you buy is a stretch needle for your machine as this should lessen the puckering of your seams.
I have to warn you, these things are addictive and easy to make.
Okay so... Ingredients:
One wooly jumper (sweater, pullover) if possible in a size medium women's or small men's unless you want to make an adult hooded cape (please somebody do this!!!)
A pair of sewing scissors
A stretch fabric needle
A strip of fabric 13cm (5'') wide by 112cm (44'') long
Sewing thread
Sewing thread

So you begin with a jumper. Lay it out flat on a large-ish cutting table.

Cut the bottom of the jumper off just under the armpits in a straight line, the arms in half and the neckline too!

You should be left with something that looks like this ^^^ The arm pieces on my jumper ended up being about 26cm (10'') by 21cm (8'') but don't worry too much about this as you will have the opportunity to trim these pieces down. Don't throw away the pieces of wool not included in the photo. I will be writing another tutorial about how to turn them into some stylin' mittens!

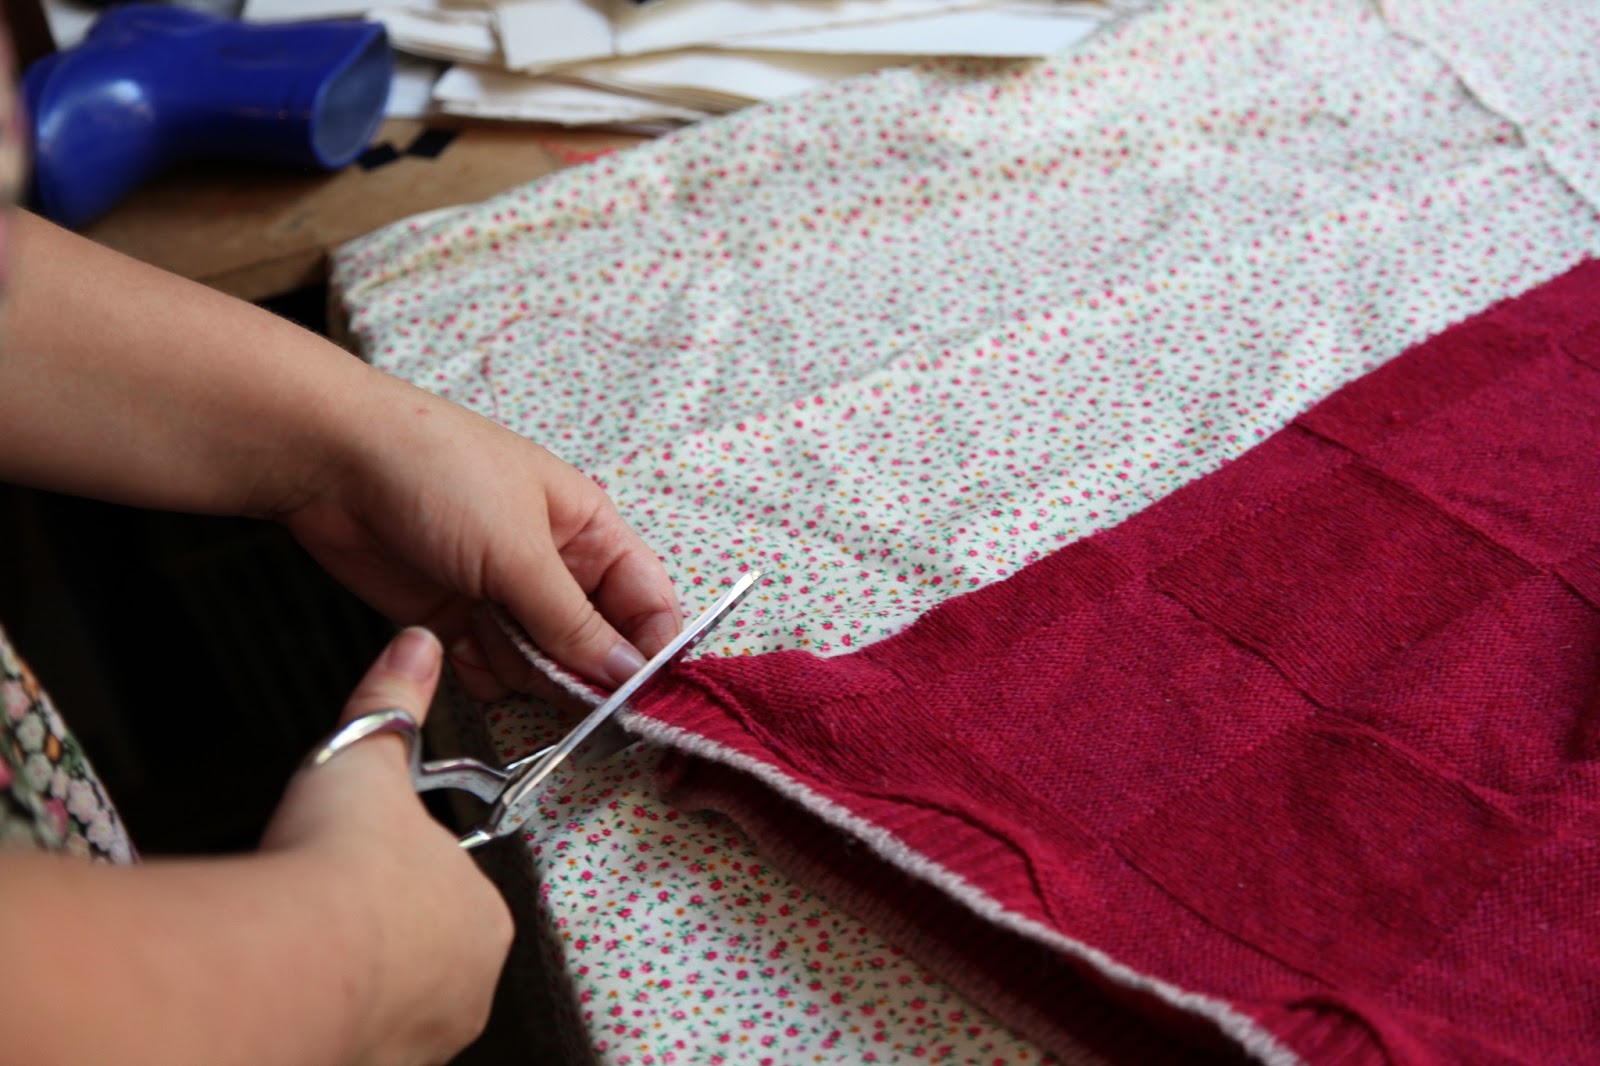
Find the seam on the larger, bottom part of the jumper and cut directly along it.

You should have a long piece of material that looks like that ^ This will be your cape piece.

Do the same to the arm pieces, these will be your hood.


And to the ribbing from the ex-neckline, do the same. This will be the pretty binding on the hood.


Right sides facing, straight stitch down the smaller edge of the hood pieces.


Right sides facing, pin and sew ribbing to long end of the hood pieces with a straight stitch.

Flip to the right side up, and top-stitch seam.

Your hood now looks like this, right side up!


Right sides facing, pin remaining "long edge" of hood and sew right down.

Trim any excess fabric at the bottom of the hood.

Turned out, your hood should be looking pretty snazzy (and finished)!


Okay now for the cape part. Cut the ribbed edge of your cape piece off at a width of 4cm (1.5'').


Cut the long piece of ribbing in half and pin to either side of the edge of your cape, right sides facing.


Sew and topstitch these seams with a straight stitch.

Trim excess, and you should have a neat looking finished edge.

Now if you've never gathered before, you should probably have a look at this tutorial. Don't be scared, it's fun!


Gather the remaining ribbed edge of the cape piece to be the same size as the base of the hood.

Now this part is tricky. Wrong sides facing, pin the gathered cape piece to the hood, making sure they are the same length.

Sew seam with a 3cm (1'') allowance.

It should look like this.

Reinforce these pieces by topstitching down.

Here's where your fabric strip will come in handy, try to choose something that will complement the colour of your cape.

Fold fabric in half lengthwise and sew as shown in the photo above, making sure to leave a gap in your outside seam approximately halfway (allowance for turning strip).

Once you have stitched and turned your fabric strip, it should look like this ^ and is now the tie to your cape!

Pin the cape-tie to the raw seam on the right side of your cape, (concealing the ugly bulk of combining the gathered wool to the hood).

Sew the tie down with a zig-zag stitch on both sides.

Roll-hem the bottom of the cape with a straight stitch. Remember- a stitch in time, saves nine so please double hem this as knits have the tendency to grow ladders!

And...... you're done!

And because you should never forget where you came from x
I welcome any comments you might have on how I could improve this and any other tutorials I have posted. please let me know of any problems you have with understanding these instructions.
You are so clever! Wonderful tutorial. Love the photo of casper with the big grin on his face. xo
ReplyDeleteThis is so, so clever...but somehow I don't think my 15 year old will agree to wear it...he's such a party pooper ;0)
ReplyDeleteThis is great Ruby, thank you. I have a friend who has just had a baby and I'd love to make her one. Your instructions make it look easy so I'll give it a whirl and see what I come up with. I love that you sewed the old label into your new cape. So how big a jumper do you think you'd need for a grown-up one? Also, and this is prob a silly question, but do you need to change any settings on the sewing machine when you use a stretch fabric needle?
ReplyDeleteThanks Kylie, You should go for it! You won't need to change the settings on your machine, from what I understand, a stretch fabric needle has a ballpoint on the end instead of a sharp point so it does not penetrate the fibres, rather it finds the gap in between them therefore doesn't put strain on the "stretch" of the fabric! I hope that makes sense, it's a strange concept! xxx
DeleteOh and for a grownup cape, I think you'd need quite a huge jumper, maybe a men's one from the 80s?
DeleteThank you Ruby, I'll keep you posted.
DeleteThis is the cutest thing I have ever seen! I'm doing it!
ReplyDeleteBettina
www.littleoldsouls.com
um how clever are you!!
ReplyDeleteI want to make one now :)
xo
so so so very clever! It is really quite amazing! xx
ReplyDeleteFabulous! Bookmarking!
ReplyDeleteSo cute!!! aaah. I just watched a film called 'Lore' which is an Australian-German production set in Germany as the war ends in the 40s - rather depressing but featured a number of lovely knitted bonnets on the baby in the film. I haven't tried any of your tutorials yet but this one seems easy with good photos, suitable for beginners.
ReplyDeleteFantastic tute Ruby. Would love to have some dimensions of the cape part as well as the hood so I can do it with a blanket instead of a jumper, other than that your instructions seem very clear and detailed. mel x
ReplyDeleteThis looks fab, I love it! And thank you for such brilliant and clear instructions! (heads off to raid husband's jumper drawer...!)
ReplyDeleteYou are so clever! I am too terrified to cut anything knit because I just assume it will fray everywhere. But I guess if you work with it fairly soon you should be ok! and I should stop being paranioid!
ReplyDeleteMeanwhile... about that adult cape... :-D
This is adorable, as are the photos in Casper in it. So inspiring!
ReplyDeleteThis is so sweet! What a wonderful idea!
ReplyDeleteCasper is a little doll! Your cape tutorial is fantastic!
ReplyDeleteI clicked over from Girl Inspired link up:)
~Michelle
Great tutorial!! And seriously, Casper wins the cutest kid ever award!!!
ReplyDeleteThis is incredible! I love how it looks anyway, but I especially love how it repurposes an old jumper. We live in such a wasteful society. I need to work out a way to pin this.
ReplyDeleteHere's my other favourite use for an old jumper:
http://attic24.typepad.com/weblog/crochet-wooly-jumper-cushion-.html
Now I just need to start wearing more wooly jumpers so that they can get old and I can make cool stuff out of them!